I’m revisiting Martin Odersky’s Scala course at Coursera. This is the second running of the course. Last time, I tried to get things running with IntelliJ IDEA, and reluctantly reverted to Eclipse as nothing seemed to work properly. As this is my second time doing the course, and also as I would like to actually work with Scala (despite its sluggish dev experience in IDEs…but that’s another story), I was determined to get things running in IntelliJ no matter what. I’ve managed to get things running (yay) after quite a bit of trial and error. This may or may not be the exact steps needed, but I seem to have successfully reproduced the issues I was having, and resolved them. So, here goes nothing…
Target Issues
The steps outlined in this guide will resolve issues where IntelliJ can’t load Scala projects, can load them but compilation fails, code seems to be ok, but dependencies like junit, etc. aren’t found (i.e. in the project structure window, the entries in Project Settings > Libraries are mostly red), etc.
Set up
I’m running Windows 8.1 x64. I started off with a clean machine. In terms for drives and directories, windows is on C:\, however, I’ve changed my documents directory to be E:\.
This guide uses JDK 1.7.0_55, SBT 0.13.2, and IntelliJ IDEA 13.1.2.
Step 1: JDK
I installed JDK 7 from http://www.oracle.com/technetwork/java/javase/downloads/jdk7-downloads-1880260.html . The exact file is jdk-7u55-windows-x64.exe.
Note: I tried installing JDK 8. While that installs fine, attempting to run sbt gives weird errors saying that some Char package or something is broken. I hope this is a temporary issue. However, I did not pursue this further and stuck to JDK 7.
If the installer doesn’t automatically do this, put the jdk bin folder in your PATH. For me this was D:\Program Files\Java\jdk1.7.0_55\bin.
To check if the installation worked, open a command prompt anywhere and try “java –version” and “javac –version”. Both should succeed, and give 1.7.0_55 as the version.
Step 2: SBT
I installed sbt from http://www.scala-sbt.org/release/docs/Getting-Started/Setup.html . I used the msi installer for version 0.13.2 (there’s a drop down at the top of the page).
This put D:\Program Files (x86)\sbt\\bin in my PATH. Note the extra ‘\’. I changed my PATH so it had D:\Program Files (x86)\sbt\bin. Why the extra slash? Dunno, don’t care :)
To check if the installation worked, open a command prompt anywhere other than a sbt project directory and try “sbt sbt–version”. This should give 0.13.2 as the version.
Step 3: IntelliJ
I installed IntelliJ Community Edition from http://www.jetbrains.com/idea/download/ . Nothing particularly notable about the installation. My version was 13.1.2, which is the latest.
Step 4: IntelliJ Scala Plugin
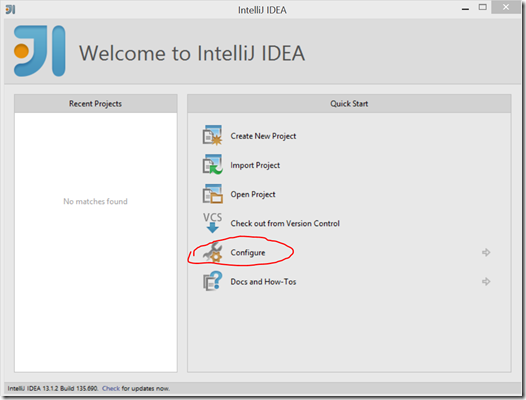
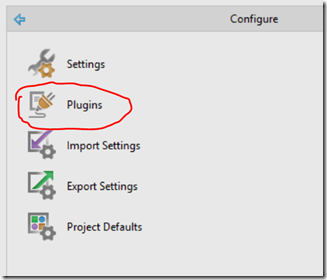
I fired up IntelliJ and hit Configure, then Plugins:
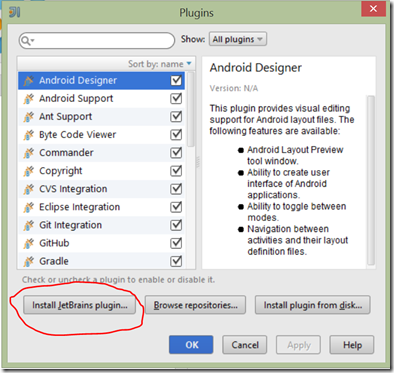
In the next window, click “Install Jetbrains plugin”:
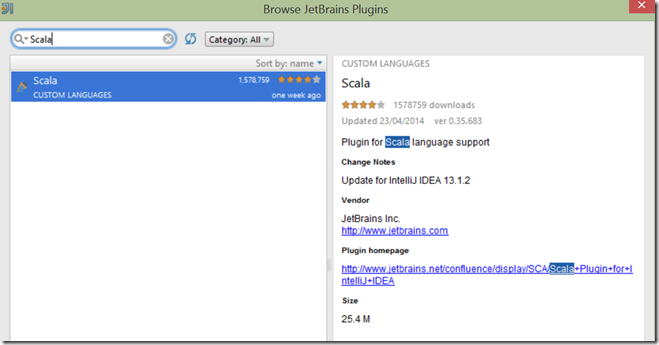
Type in Scala in the search box, and install the plugin. Close the window, and apply. This should restart IntelliJ.
WAIT – WE’RE NOT DONE YET
According the course Wiki, you can go ahead and create projects, even SBT ones. However, if you download the assignment projects, and import them via the sbt file, it seems that it can’t resolve the dependencies folder. This means that while you can code the main source files, the code for tests always have red squigglies for things from junit, etc.
Step 5: sbt-idea sbt plugin
It’s time to install a plugin that can resolve the issues related to finding the dependencies. The plugin to use is sbt-idea : https://github.com/mpeltonen/sbt-idea .
You don’t need to download the project or anything. The way to install it is as follows:
- Got to your root directory. If I open up git bash, and do “cd ~/”, it takes me to C:\Users\Ashic. However, simply applying the following steps to that directory didn’t work for me. I had to apply the same changes to E:\ (which is my “Documents” root).
- Go into the .sbt folder. Create a folder called “plugins” if it doesn’t already exist. Create a file in the plugins folder called “build.sbt”.
- Add the following line the the build.sbt file:
addSbtPlugin("com.github.mpeltonen" % "sbt-idea" % "1.6.0") - Back in the .sbt folder, you should see a folder called 0.13. Go into that folder.
- Create a “plugins” directory and “plugins\build.sbt” files in that folder if it doesn’t exist. Add the same line to that build.sbt file as we did previously.
Setup Done…Except…
The setup is now complete. However, when working with an existing sbt project, there’s one more step necessary. Let’s download the example assignment from http://spark-public.s3.amazonaws.com/progfun/assignments/example.zip . Unblock it (properties windows), and extract it to a folder of your choice. Open a command prompt and go to the extracted folder (i.e. the folder containing the src folder.). Run the following command from the command prompt: “sbt gen-idea”. That should create the metadata files IntelliJ needs to discover dependencies, run the project, etc.
With the metadata files generated, open up IntelliJ and choose to open (not import) a project, point it to the folder containing the project’s build.sbt file (not the sbt file itself). You should be able to load the project without errors, run tests using IntelliJ, etc. Whenever you have a new project you want to load, just extract it, run sbt gen-idea and you should be ready to go.
All Done
From reading docs, comments, etc. it seems IntelliJ should be able to load sbt dependencies and keep them in sync. An interesting point to note is that if we run “sbt sbt-version” inside the extracted assignment folders, it shows 0.12.4. I imagine this is because the project was created with that version, and maybe this is what’s preventing IntelliJ from working as expected. Anyhow, running gen-idea seems to fix the issues.
Hope that helps :)


